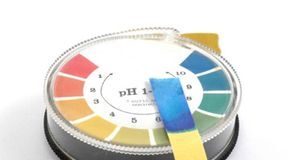
Spring is officially here. The snow is gone, the flowers are pushing through the ground and suddenly everyone wants to wear sandals. It’s a cultural reset button. We buy new clothes. We plant petunias. And inevitably, we become obsessed with our toes.
For most women, a salon pedicure is the gold standard. You dive into warm water. You are browsing the magazine. You leave the job to someone else until your feet are ready for sandals. It’s beautiful. It’s relaxing. It is also expensive and time consuming.
I learned this the hard way. A few years ago, I got tired of burning money at high-end day spas. I switched to the cheapest walk-in joint I could find. The price was right. The result was a nasty foot infection that ruined my summer plans once and for all. There is nothing quite like foot fungus to make you hate the sun.
So I stopped paying for other people’s mistakes. I started doing pedicures at home. It saves money. It saves time. If you wish, you can also do this on Tuesday at 23:00. You can make it a girls’ night in. A mother-daughter bonding event. Or if you’re feeling brave, a date night.
Here’s how you can do it without getting infected or breaking your budget.
Shopping list
Before you start, you need the right tools. You don’t need a spa kit. You need the basics. Grab these items before you start:
- A tub or large basin
- Soaking salt or bubble bath
- Clean towels
- Cuticle oil
- Nail file, nail clippers and cuticle stick
- Pumice stone and foot file
- Nail polish (primer, color and top coat)
- Cotton pads (they are cleaner and more precise than cotton balls)
- Foot cream
- Nail polish remover
Step 1: Strip the Old Polish
It seems obvious. But have you ever looked at your toes lately? Many women apply nail polish until it cracks, hoping the rest will fall off. That never happens. In the end, there will always be a stubborn stain that won’t go away. Worse, leaving the old paint on for too long can cause yellowing and discoloration.
Start by removing everything.
At the pharmacy you have to choose: acetone remover or acetone-free remover. Acetone is heavy duty. Removes the color quickly, but dries the skin and nails. Non-acetone is gentler – originally designed for synthetic nails – but requires more scrubbing and effort to remove dark colors.
My advice? Use acetone. It works better. Just be careful around the cuticle area. Acetone quickly removes natural oils. If it gets on the skin around the nails, it will crack and dry out. Apply it to the nail plate, not the surrounding flesh.
Step 2: Soak Your Tooties
Once the old paint is gone, your feet are bare. Now, we prep the canvas.
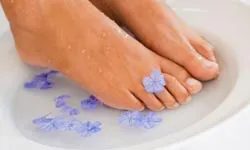
The Soak: Where it all begins
It starts with warmth. Fill a small tub, bowl, or even a sturdy basin with hot water. Add a bubble bath and a generous handful of Epsom salts. It’s not just about hygiene; it’s a reset button for tired, sore feet. Salts relieve tension. The water softens the hard, hardened skin so that the next steps – pumicing, filing, trimming – are really possible without damage.
You can avoid salts and use scented oils instead. They smell incredible, moisturize intensely and create a high-end spa atmosphere right in your bathroom. Commercially available foot soaks also work, usually with peppermint or eucalyptus added for a cooling and refreshing kick. Do you want to enjoy full luxury? Get an electric bubble foot bath at your local beauty supply store. The jets massage while the water works.
Ten minutes is the sweet spot. Any longer and your skin becomes a shrunken mess. Ten minutes is enough to soften the keratin and let your brain shut off. Keep a gossip magazine or your favorite podcast close at hand. This is the decompression phase.
3: Handle Cuticles With Care
Time to move. Lift one foot out. Pat dry – do not rub it vigorously. Apply one drop of cuticle oil directly to the skin surrounding the nail bed. Rub it in. Use a wooden or plastic cuticle stick to gently push back the dead skin. Don’t force it. The goal is to soften rough edges, not excise tissue. Rub the oil all around the nail. Plop the foot back into the basin. Repeat on the other side.
Here’s the hard truth: If your salon pedicurist cuts your cuticles, they’re wrong. Most dermatologists don’t recommend it. Cutting the skin creates an entry point for bacteria and infection. You don’t want that. Keep the area moist. Let the stick manage the frayed parts. Let oil do the heavy lifting.
4: Exfoliate
Now that the skin is softer and the cuticles tamed, you can deal with the dead layers. This is where you get smooth.

Exfoliation isn’t just about looking good; it’s about letting your skin breathe. When you slough away that layer of dry, dead skin, you’re actually helping to soften stubborn calluses and revealing the healthy skin underneath. You can grab a commercial foot scrub at the drugstore, or keep it simple with a DIY mix of kosher salt and olive oil. Some people prefer using exfoliating gloves alongside the scrub for extra grip.
Take one foot out of the warm water. Gently massage the scrub into your skin, moving in an upward motion for about two to three minutes. Repeat on the other leg. It feels incredible. The motion stimulates circulation and washes away the stress of the day.
Rinse off the excess scrub in your tub or basin. For that true spa treatment, microwave a damp towel for 15 seconds and wipe your feet clean. The heat will make you want to tip yourself.
Dealing with Calluses Without Damage
Calluses form where friction and pressure are constant. You’ll usually find them on the heels, the ball of the foot, or the side of the big toe. Runners and dancers get them from practice. Women who wear high heels or tight shoes get them from fit.
You have options for treatment. Pumice stones or callus stones work best on damp skin to soften rough patches. Foot files offer more abrasion for smoothing. You can use these tools on your heels too. Stop immediately if it hurts or if you break the skin.
The goal is smoothing, not removing. Calluses are protective. Shaving them off exposes vulnerable skin to infection and damage. I learned this the hard way. I had my calluses shaved before a tennis match. I don’t remember the score. I do remember hobbling to the bathroom to soak my blistered feet that night.
Locking in Hydration
Moisturizing is simple but essential. Rub a thick foot cream or lotion onto your feet and legs, again using an upward motion. Add a few drops of peppermint oil for a tingly sensation. Look for heel creams containing shea butter for deeper hydration.
For intense moisture, try a foot mask. Unlike facial masks, these often require wrapping your feet in plastic wrap or baggies while they set. It’s messy, but effective.
You can buy these at beauty stores or make your own. Blend cucumbers, lemon juice, and olive oil. Put equal parts in two baggies, slide your feet in, and relax. After 10 minutes, rinse and moisturize. Then, move to the next step.
Trimming with Precision
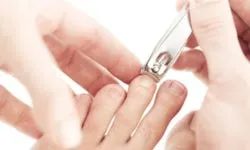
Designed for safety and style
Now it’s time to prepare the toenails for painting. Target? Clear lines. But how short should they really be? A reliable benchmark is to cut them so that your finger can slide over the top of your foot and your nails barely touch your skin. If it feels scratchy, they are too short.
Grab a clean, curved pair of clippers. They are easier to control than straight ones. Here’s the trick: cut straight across. Don’t dig into the corners. It’s tempting to round them off because you think they look pretty, but that leads to ingrown toenails and painful hangnails.
Instead, cut the edges at a 45-degree angle. At the moment, the intention is not to make them stylish or beautiful. It’s about safety. This sharp corner needs to be softened later. For now, get the bulk off without endangering the skin.
8: The Right Way to File
Forget the movies. A picture of a fed-up assistant breaking gum and aggressively sawing her nails back and forth? It’s a myth. And it’s harmful.
Sawing back and forth causes the layers of the nail to fray. It weakens the structure. You want a gentle movement in one direction.
Start at the outer edge – the 45 degree point you just cut. File lightly towards the center of the nail. Repeat this a few times until the edge is smooth. Then switch sides. File from the other outer edge towards the center.
Aim for a soft square shape. It’s the most flattering and safest. Ovals? You pull the nail too close to the skin on the sides. This friction is a recipe for inflammation. Keep it flat. Keep it flat. Once you have a consistent look, you’re ready for color.
9: Polish and dry
This is where the magic happens. But don’t just throw it out there.
First, clean the nails with an acetone-free remover. Any oils or creams will cause the nail polish to slide off immediately. Let them dry completely.
Apply the primer. It protects the nail from stains and ensures that the color lasts for a long time. Allow to dry until sticky and not wet.
Then your color. Thin layers are better than thick ones. Thick layers come off faster and take forever to dry. Usually, two thin coats will beat a heavy one.
Finally, top coat. This seals everything in. It adds shine and prevents chipping.
And then? The hardest part. Waiting.
Do not put your hands under cold water to speed up the process. It can cause dents. Do not wear socks immediately. Give it at least ten minutes of real, undisturbed drying time. If you must go out, use a quick-drying spray or drops. They evaporate solvents faster.
Take your time. Toes work hard. They deserve a finish that lasts.
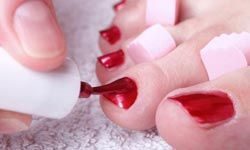
First you need to prep the canvas. Take a cotton ball soaked in nail polish remover and apply it to each toenail. This will remove any moisturizer or oil left behind from soaking or scrubbing. This hydration is great for your skin, but it also makes the nail polish slippery, making it come off faster. A clean, dry surface is required for the color to harden.
Invest in toe separators. This may sound like a small detail, but it’s a game changer. Instead of sitting stiff like a statue, you can actually walk with wet nails. Paper towels and toilet paper can be used sparingly, but they get dirty easily and often fall apart. Using the right dividers keeps everything tidy.
Before opening the bottle of polish, roll it gently between your palms. Air bubbles can form from shaking, which can cause streaks or unevenness. Rolling mixes the pigment without the foam. Then patiently apply the layers. This is where most people rush and fail.
- Primer. Wait about 2 minutes.
- The first polishing layer. Wait about 2 minutes.
- Second coat of polish. Wait about 2 minutes.
- Topcoat.
We’ve all seen this happen. Even if you spend 30 minutes exfoliating and filing, you can’t wait for the nail polish to dry and ruin it in the final step. Do not use a hair dryer. Heat can cause the varnish to thicken and become uneven. Fast-drying varnishes and topcoats often contain alcohol, which can actually cause the varnish to crack more easily over time. If you need speed, choose oil or spray. But what is the best advice? Just go the old way. Just wait. Let it sit for 15-20 minutes. You did your best. Now don’t mess it up.
Clean up supplies
One of the best things about DIY pedicures is that the tools you use are clean. However, if you actually clean them afterward. The last step is to prepare the set for the next time.
Wash and rinse your foot basin or tub. Disinfect with a mixture of 95% water and 5% bleach. Rinse clippers and other metal tools with hot water and use disinfectant spray. Wash pumice stones, callus removers, cuticle sticks and files with warm water and a mild detergent. Baby soap or shampoo works well here. However, don’t rub too hard. The abrasives that make these tools work wear out.
Close the nail polish cap tightly to prevent drying. Also store the remover with a cap to prevent liquid leakage. Store the polish in a cool, dry place. Wipe all instruments dry before packing them away. If it is left wet, it can develop rust and bacteria. Replace the tool when it is worn or heavily soiled. Keep everything in one place so you’ll remember where it is the next time you pampering session.
Polished to Perfection
即使您已经这样做多年,完美的应用几乎是不可能的。 错误会发生。 以下是修复它们的方法。
拿一根用于pushing back cuticles的橙木棒,将末端浸入丙酮去光剂中。 沿着指甲边缘擦拭,以清理角质层和皮肤。 如果你没有橙木棍,棉签也可以,尽管不太精确。 您还可以购买矫正指甲油去除笔。 它们充满了去除剂,并且具有良好的可操作角度。 您可以在美容用品商店找到它们。
还有一种偷懒的方法。 等到第二天早上洗澡时,在脚趾甲周围多擦一点。 这并不花哨,但很有效。
现在,坐下来。 把那些漂亮的tootsies踢到桌子上,欣赏你的作品。